Showing posts with label horses. Show all posts

Tuesday, March 10, 2015

Free Use Photos

There are tons of online photos that are free to use, no strings attached.  Many are really great photos too!    Seems like a great place to get reference to paint from, right?  No worries about lighting, you get a bazillion choices for each subject, just pop em up on the good ol monitor and paint away!    Eh, wait up, maybe not.

First, even tho that freebie photo looks perfect, one of the first things many learn is photos LIE.  oh yes, they do.   Darks are often black holes, lights are washy and weak.   Perspective is usually distorted, I can't count how many paintings of horses or dogs I see that the heads are HUGE, with teensy little bodies.   And it wasn't something done as an expressive intent, its just the artist copied too closely.   I have fallen in this trap countless times but have learned to avoid it by now.   
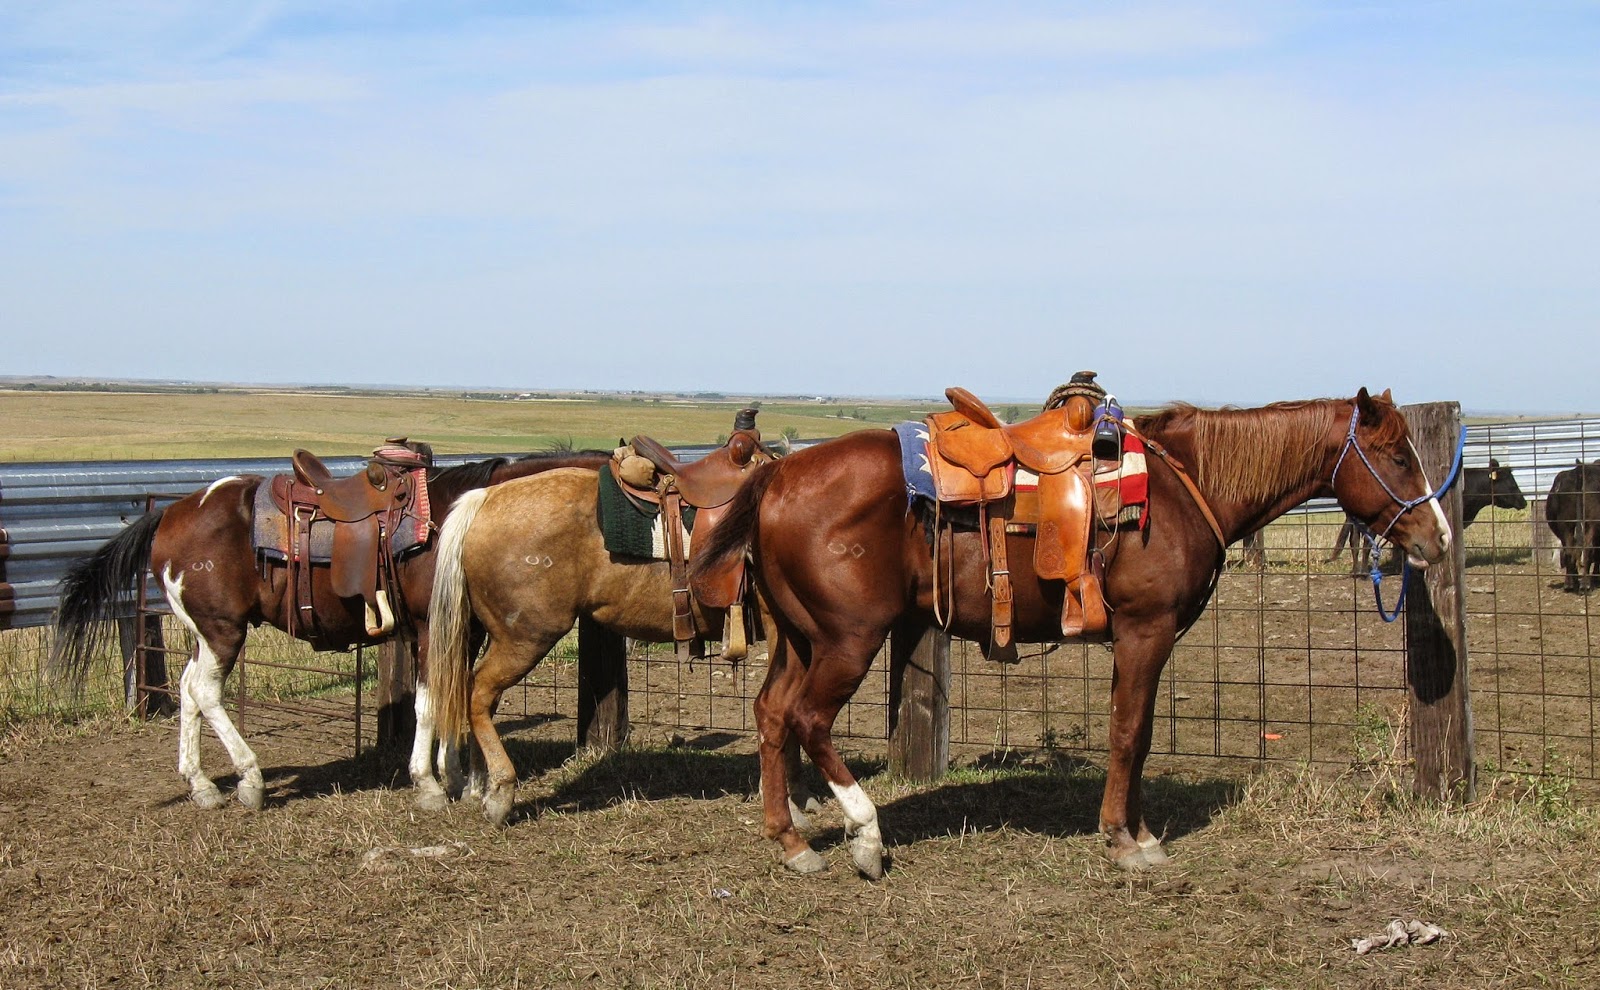
The paint horse on the far left isn't that much smaller than the sorrel in front, but in this keystoned photo, he looks like a little pony.   Painting it this way would be a huge mistake.

Part of why some art grabs you by the heart strings is somewhere in the paint is emotion.  That emotion might be love, humor, rage, or quietness.   Its not *in* the paint--paint is just a concoction with pigment that clings to a surface.    In my case, pastel is pigment with just enough binder to hold it into a stick form.  

So how does this emotion thing work?   It comes from the hand that paints it.   If you weren't at the place, smelling the breeze, hearing the birds, even dodging the cars, you lose a big part of art.   Not only in the painting itself but sadder yet, in the experience of being in the moment, being an artist.   Don't cheat yourself out of this!

Richard Schmid has some great advice in his Alla Prima book about using photos.   "...never use other people's photos.  You need your own experience of the real thing to give an authentic look to your painting.   Use your photos as soon as possible after you take them so that your memory of the subject is fresh"   And since it came from Master Richard, you know its true!   

Plein air is one of the best teachers, so even if you use photos, you learn where the lie is and fix it.   I do use other's photos they supply when painting a pet that is gone, or is too far away for taking my own photos.  But, I have painted enough of them I can see the flaws and holes and work around it.

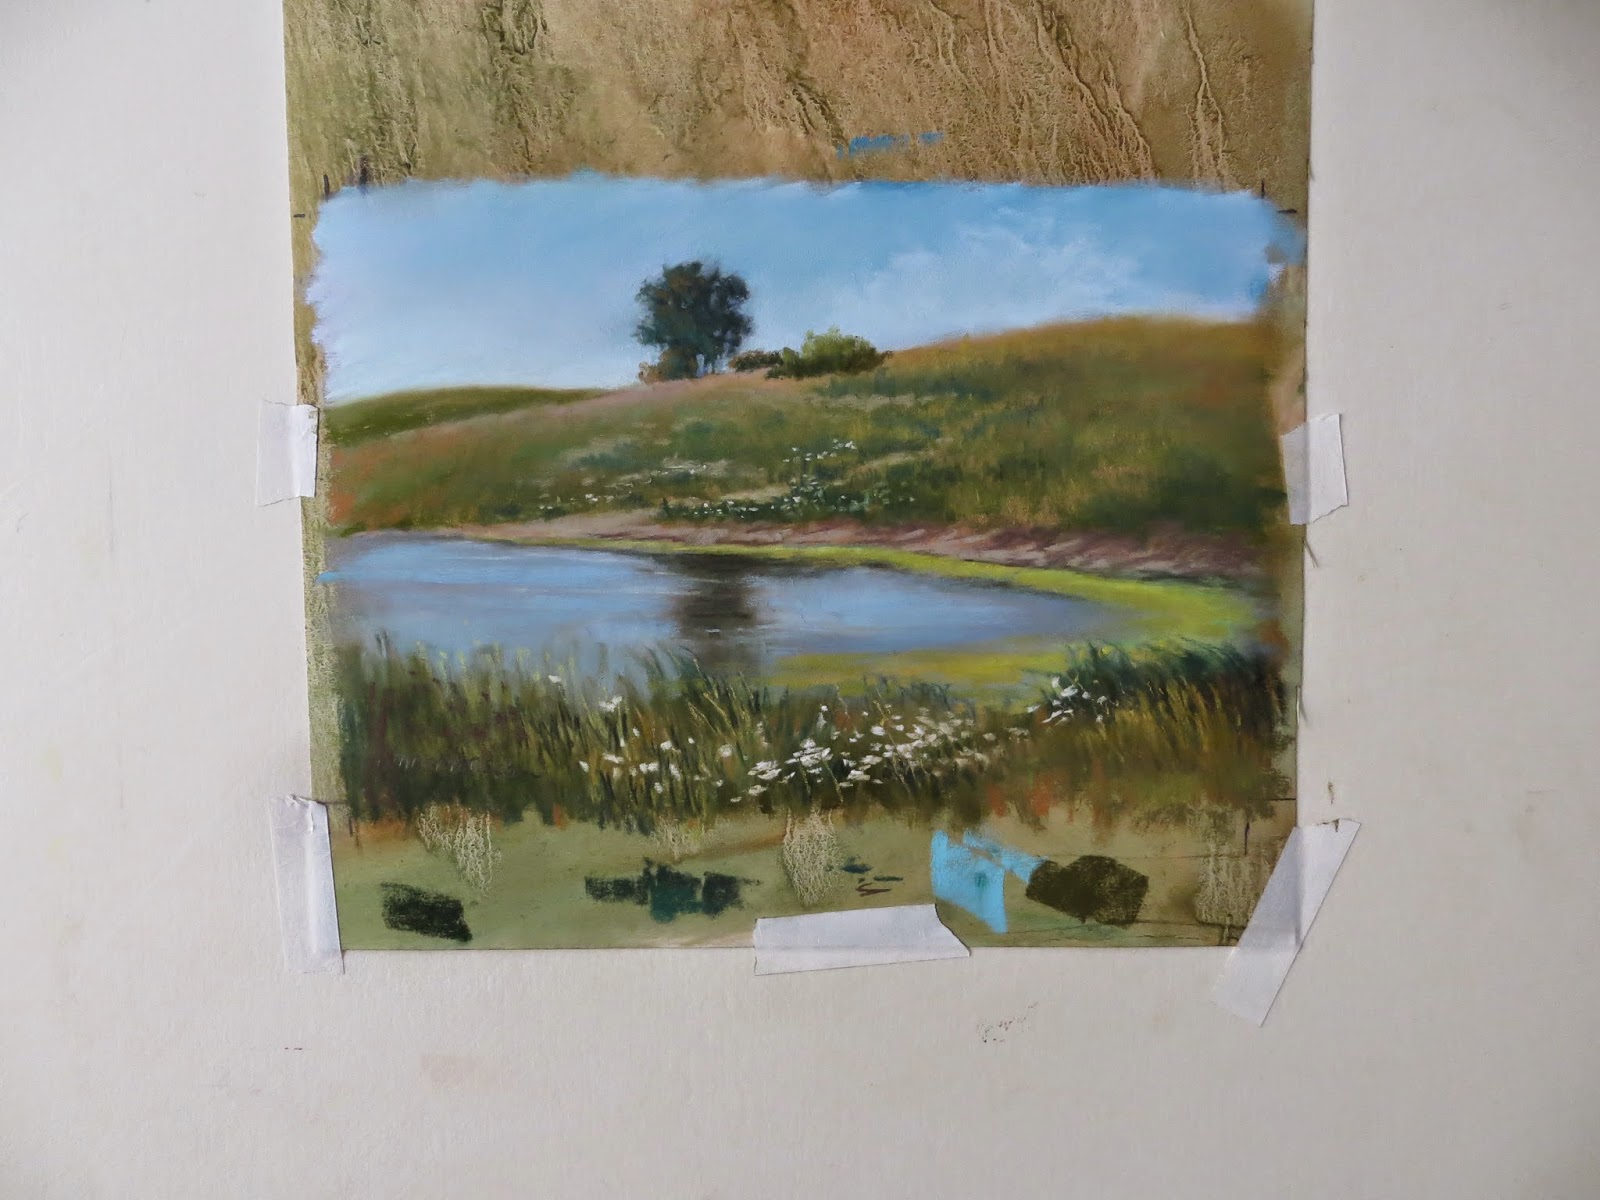
This was from a trail ride, the flowers were a long ways from the water, and there was no path from the far edge up the hill.  But these things were in the area--in taking the photo, I made mental notes of these other elements that would take it from boring to charming.
So don't cheat yourself of the experience even if you use photos.   Thats' missing half the fun!

Sunday, December 14, 2014

mounting pastel paper

Hello!   I am not able to show what I'm working on, as they are Christmas gifts and I'm not going to be the one who blows the surprise!   But, I thought today would be a good time to post how I mount sanded paper to a support board. 

Mounting it isn't something that has to be done, as sanded papers are usually heavy enough to stand alone.  I get mine in rolls, which lead to the problem of curled paper.  Not good!   I am currently using UART in 600 grit, and I very much like this paper.  Has lots of grit but doesn't seem to eat my pastels as badly as papers with heavier grit.   It handles wet underpainting well and getting a roll was more economical than sheets.   And, its just fun to have a half acre of paper, just waiting for me! 

First, figure out what you want to mount to.  I won't use products that aren't acid free, so I won't mention that at every turn today, just know, its all acid free.   So that said, you can use foam board, mat board, or mount board.   I chose foam board today.   I also chose to use grafix double tack film.   I also got my brayer and some black tape.

This piece will be 16x20, so I cut my UART to a size a bit larger, so I have space to scribble, try out colors, edges of sticks, etc.  I must have scribble space!   Then I cut the tack film to size of the UART, and the foam board is a tad larger on all sides.    I start by making pencil lines where the paper will go, then peel up one corner of the tack film, (its got slick papers on either side of the film). and smooth-smooth-smooth all the way across the foam board, rubbing with my hand, only peeling as much as I can smooth at one time.   At this point, I have a foam board with a tacky sheet on it, with a slick sheet still on top.   I now peel the top slick sheet, just a corner, and line up the UART and start peeling and rubbing down just like before.   Ta-da!   A mounted piece of sanded paper.

Next, I have started using that black tape to mark my borders.   It makes it easier for me to judge the composition this way, otherwise I seem to just keep going, then when I trim the paper to frame later, sometimes the design suffers as I now have cut off part of the painting.    This black tape fixes that problem.   I can take it off or leave it as its acid free.   (yes, I said it again!)   I run the tape about 1/4 inch outside my border.   
Ready to paint!    I put it on my main easel, using some cheapo (not acid free!) wide masking tape at the top corners, and a small clamp at the bottom.   The large white board is my drawing board, I made that with foam board on top of luan board, then painted it with floor finish poly so tape won't rip it.   I did this so I dont' have to keep adjusting my easel height--now I just tape/clip where I want the paper.  and sometimes I work big enough to cover that whole drawing board.   I also like my little quotes where I can see them.    Have a Great week!